Once you have set up your resources they will appear in the resource pool, available to the timeline. As with other resources, drag and drop them onto the timeline, then right-click to configure them with the Resource Editor:
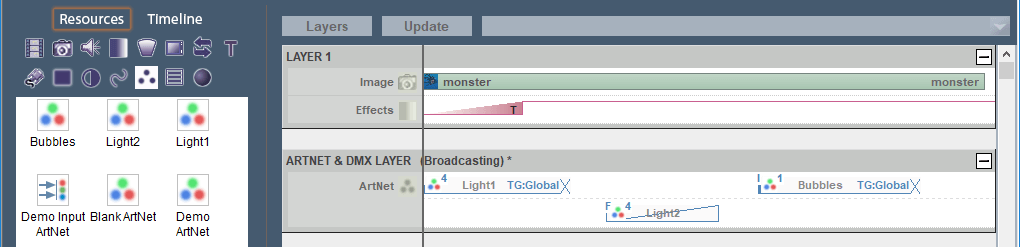
Before any Art-Net resources are placed on the timeline, all values for a DMX device are 0.
Whilst an Art-Net resource can have a Fade duration, it is essentially just a start trigger to change the current status of a DMX device to another status, using resource properties. In the example above, the Light2 resource is set to a fade; it is moved down in the layer because a fade can have overlapping duration with other events.
Fade Effect
•The Fade effect fades to the colour selected over the set time.
•If you want to fade down to a colour, set the first instance to the colour that you want, then set another instance with sliders at the new values.
Remember that Fade type Art-Net resources are not compatible with Tween or Instant, so do not use a mix of Fade with any other type.
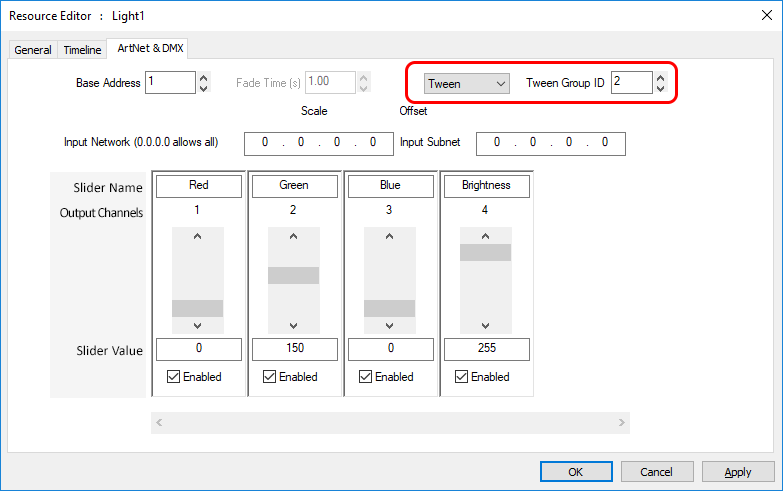
Tween Effect
The Tween effect will gradually change a light from the colour of the current instance to that of the next:

If the first instance of Light1 is set to RGB 0, 255, 0 (green) and the next instance of Light1 is set to RGB 132, 41, 187 (purple), it will transition smoothly from green to purple over the time separation between the two resources on the timeline.
All Tween and Instant type Art-Net resources can be placed in a Tween Group in order to separate different tweening effects:
Page edited [d/m/y]: 04/02/2019