Install Zixi Receiver
Run the installer for the Zixi Receiver software on the Delta server being used for the broadcast capture.
Zixi Receiver will install as a web service, which can be accessed in your web browser on 127.0.0.1:4300. This will open the log-in page, for which the login credentials are:
Username: admin
Password: 1234
Credentials and the default port can be changed.
Status Page
Logging in takes you to the Zixi ‘Status’ page where you will first activate your Zixi license. This will have been provided by Zixi or the broadcasting network. Activation is completed by selecting Options > Activate License and typing in the supplied activation key:
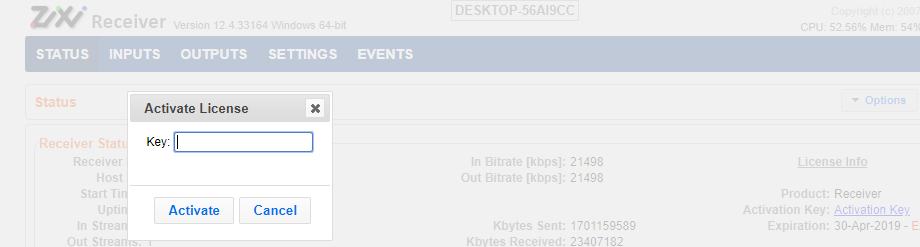
This page displays the current status of Zixi, with some useful information, such as how many input and output streams you have, as well as licensing information. There is also information displayed on how long your stream has been active, which can be useful for diagnosing issues with dropped network connections.
Adding an Input (Pull) Stream
With Zixi Receiver installed and licensed, you can configure your input and output streams. The first thing to do is add your Pull input stream details for the required broadcast. The required details will be provided by the source (broadcaster) sending the stream:
•Host IP
•Port Number
•Stream ID
•Password
•AES-128 Decryption Key
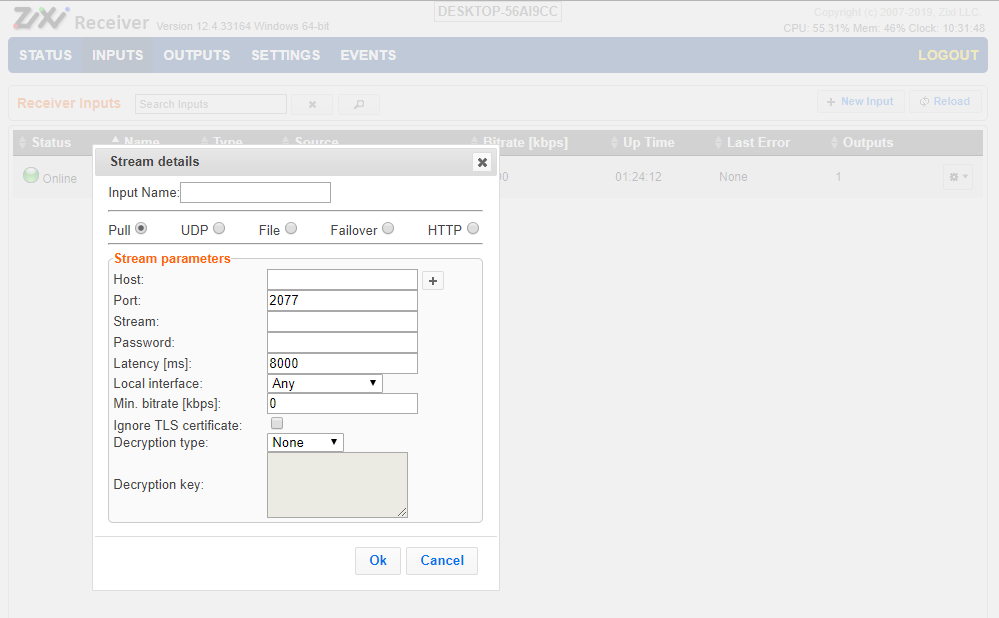
The Input Name you give to this is an internal reference of your own.
Click OK when you are done, and you should see a new ‘Input’ stream in the Zixi Inputs page:

The Status of ‘Online’ with the green dot is a healthy input. If it goes amber or red, then it generally is a sign that the connection has been dropped. It could also mean that the parameters that have been entered when creating the Input are incorrect, in this instance you should delete the input and re-create.
Adding an Output (UDP) Stream
Next create an Output from Zixi Receiver. This will take the broadcast input stream and re-broadcasts it back out of Zixi as a UDP stream, which can be played back in Delta. Click the Output tab at the top of the Zixi browser page, and select ‘New Output’.
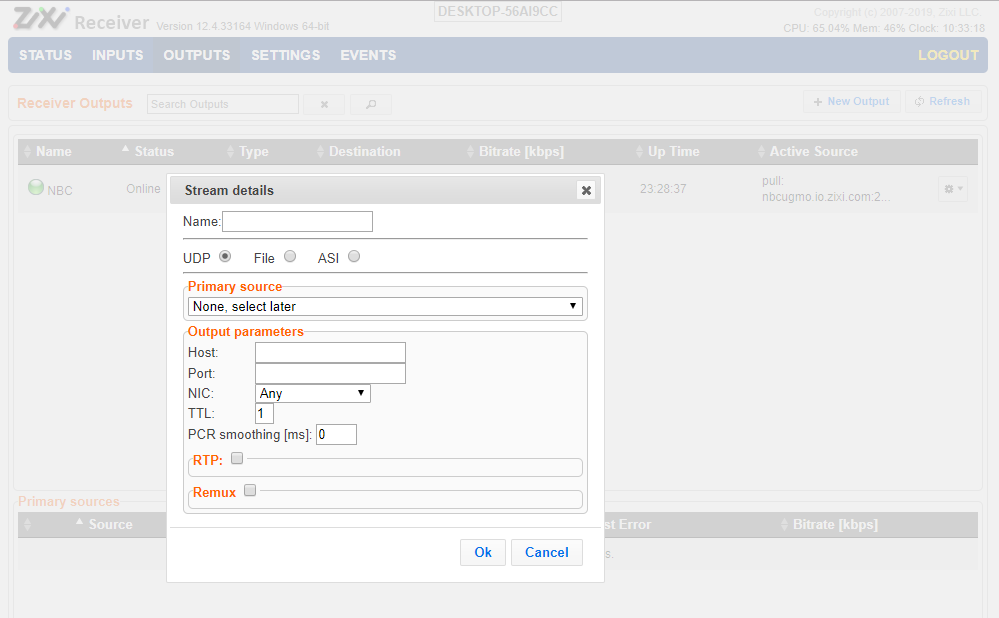
Select UDP as the output type. Click the dropdown and select the broadcast input source that you set up above.
Output parameters
As Zixi will be run locally on the playback server, specify the Host ID as 127.0.0.1 (localhost).
We recommend you configure the port number to be in the > 8000 range, to ensure it doesn’t interfere with any of the UDP ports already being used by Delta (the 7thSense Stack web interface uses port 8000 for its system Overview page.)
From the NIC dropdown, select ‘localhost’. The name of this output stream is an internal reference of your own.
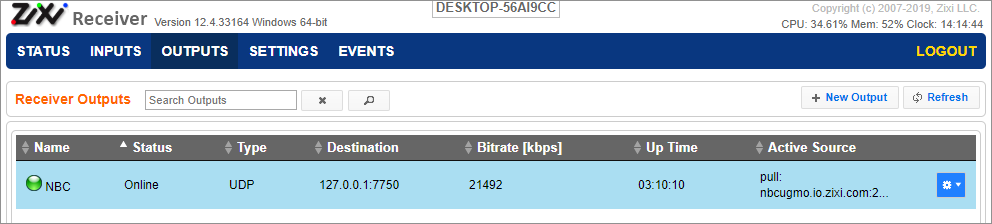
Click OK when you are done, and you should see a new ‘Output’ stream in the Zixi Outputs page:
Adding an Output (File) Stream
Sending an output to a file will create a transport stream (.ts) file, which can also be played back via a Delta timeline Stream resource. If you want to record and playback a broadcast stream, it is best to specify the output folder to which the recorded files will be exported as the Delta \Movies drive. (Zixi has its own default, but this is more consistent in Delta.)
Find receiver-private-settings.xml in C:\Program Files\Zixi\Receiver. Edit this so that the output location points at the Delta server Movies folder:
<?xml version="1.0" encoding="utf-8"?> <ROOT_FOLDER> <PATH>E:\Movies</PATH> </ROOT_FOLDER> |
Note that we shall use a Delta External Control command to record, which uses a default file name. The recorded movie path will therefore now be E:\Movies\rec.ts. Each time you record you will overwrite this file, unless you intervene or, for example, add a batch script to preserve previous files.