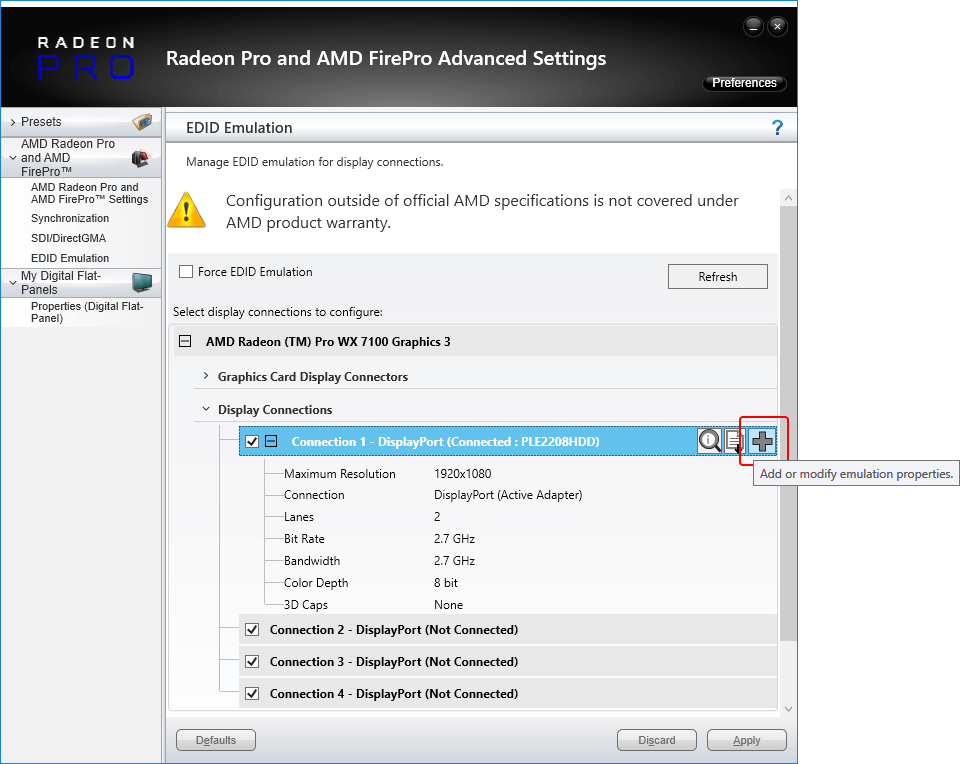
Select EDID Emulation from the left-hand menu, then click to small + box under ‘Select display connections to configure’, to expand the available GPU connections:

In this example, a single Radeon WX 7100 in installed, and you can see that whilst we have four adapters in the GPU ports, only one is connected. Select the connected port:
•the magnifier shows raw information about the current EDID
•the page icon downloads the current EDID, in this case, the PLE2208HDD EDID from the connected monitor
•the large + will add an EDID to connections with a ticked check box. Click this to open a dialog:
From the dialog, select EDID ‘From File’ (file type *.bin) and browse to C:\Program Files\7thSense\Delta\Utilities\EDID Files:

In the Connection Properties:
•Lanes should be set to 4.
•Bit Rate: dual link or above, 5.4 GHz, otherwise 2.7 GHz.
•Bandwidth should be changed to 5.4 GHz for higher output EDIDs, e.g. 4096 × 2160@60.
•Color Depth 8-bit or 10-bit depending on output required. This is important for Working in 10-bit Colour Depth.
Select the EDID that you want to use and change the properties underneath. You can either apply the EDID from the display (if connected) or load a *.bin file in the local directory (select ‘From File’ and Browse to the file).
Finding the right EDID
7thSense provides a collection of available EDIDs, located in: C:\Program Files\7thSense\Delta\Utilities\EDID Files. Change the file type (bottom right) to binary to see these files:

Select the EDID for the right resolution, bit depth and frame rate. Some EDIDs indicate specific interface types (HDMI, DVI); take care to select the correct option. Display devices (projectors, monitors) have their own set of embedded EDIDs that can also be used. Open the selected EDID then ‘Apply’, to apply it to all of the selected AMD display connections.
The Advanced Settings page will now display which EDID is connected to the relevant ports.
Unexpected screen resolution?
If, after emulation, the resolution is different from what you are expecting (an EDID can contain multiple resolutions and refresh rates), you will need adjust Windows display settings.
Right-click on the desktop and select ‘Display Settings’. In ‘Customize your display’, scroll down to the bottom of the page and select ‘Advanced Display Settings’. Then select ‘Display Adapter Properties.
In the Display Adapter Properties window, click ‘List all Modes’ at the bottom and then select the resolution from the drop-down menu (this may need to be applied per output).
With the correct resolution now set for each output, proceed to grouping configuration your displays.
Page edited [d/m/y]: 20/12/2021