Note that we only support active adapters for the Pico. |
Emulating and grouping AMD Radeon displays with the Pico is slightly different. From Windows Start (or right-click the desktop), open AMD Radeon Settings:
Display
Select Display and then EDID Emulation:
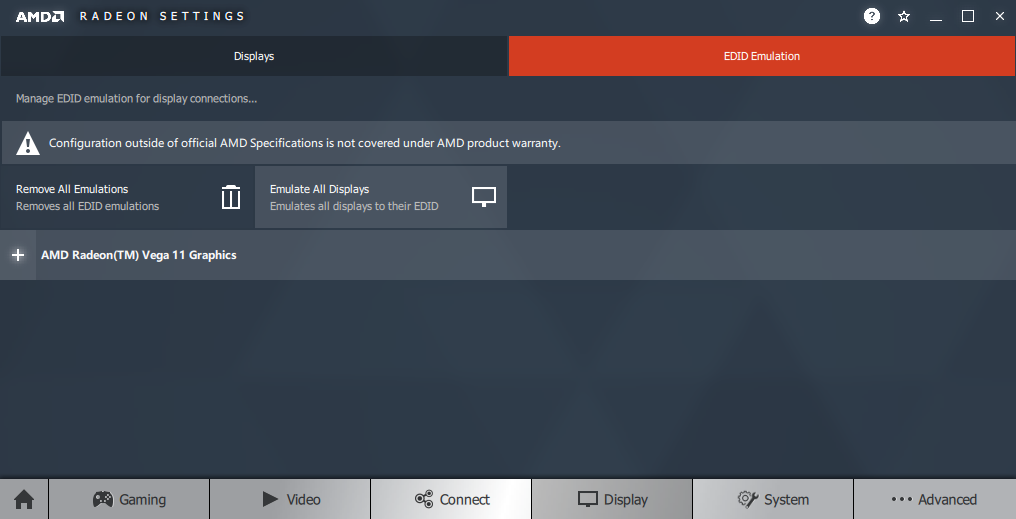
Emulate all four connections, or select a port to configure by expanding the Radeon bar:
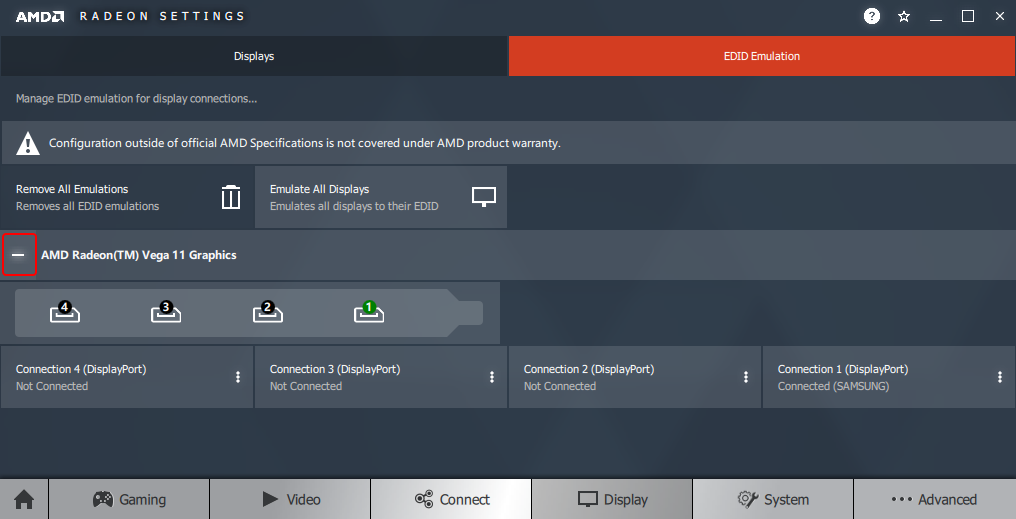
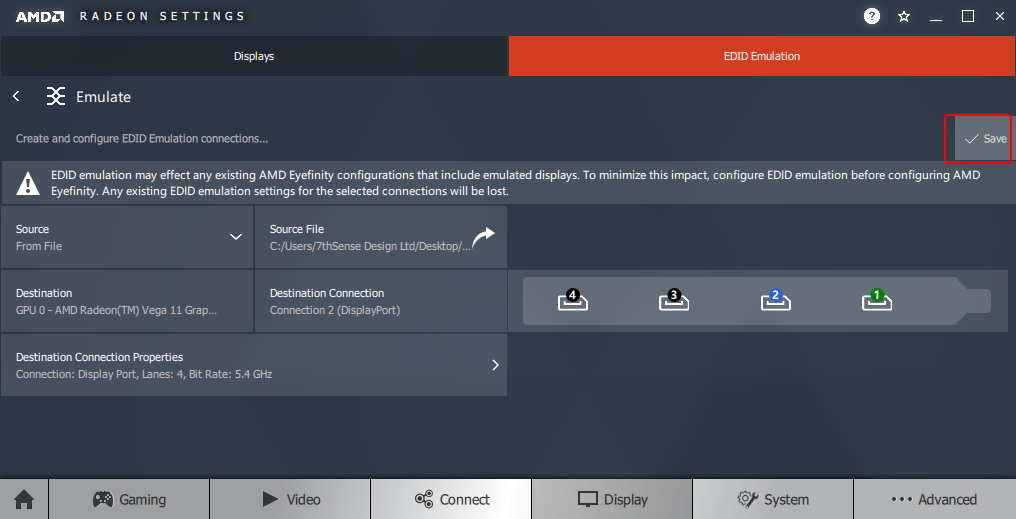
For the required connection, click the three dots and then ‘Emulate’. Reading across, you have the Destination, the Connection and the graphic, with highlights in green (connected), blue (current selected) and black (not connected). Click ‘Source’ for the EDID of the selected connection:
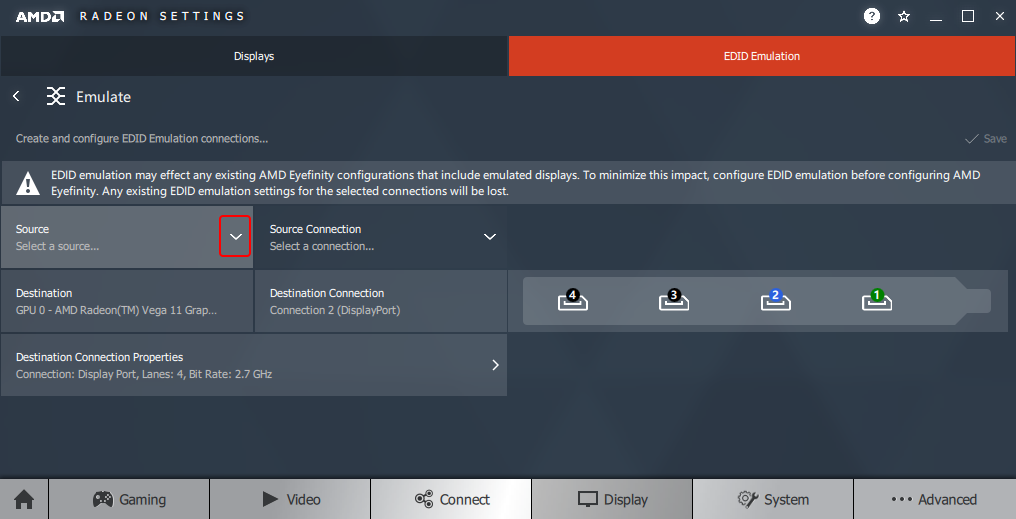
‘Source Connection’ changes to ‘Source File’; click and browse to select the txt format EDID file you want.
Next, Click on Destination Connection Properties, and make sure the Bit Rate is correct. This needs to be 5.4 GHz for anything above WQHD (2560 × 1440):

Now step back to the ‘Emulate’ page (there is no user confirmation) and click ‘Save’ on the right:
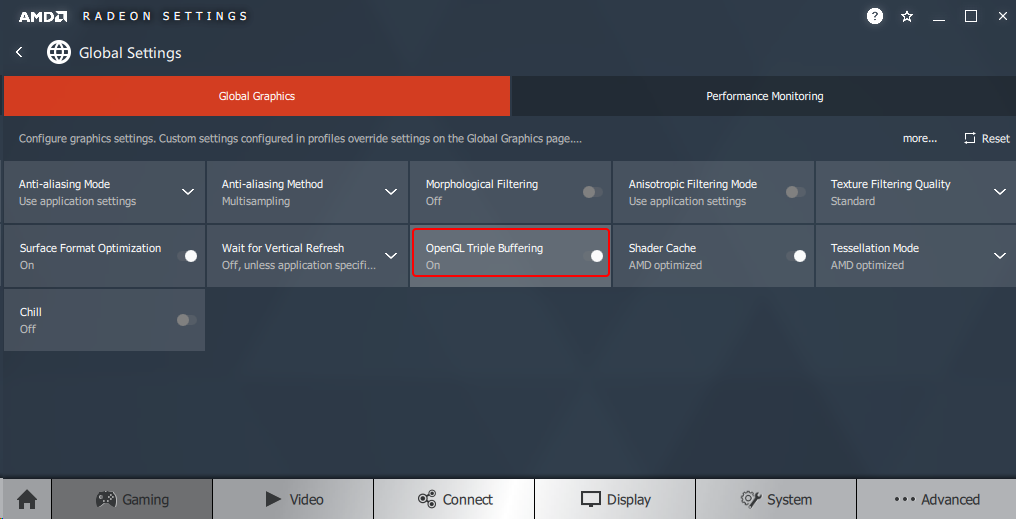
Gaming
For UHD or higher, there is just one setting here. Click ‘Gaming’ and in Global Settings, switch on ‘Triple Buffer’:
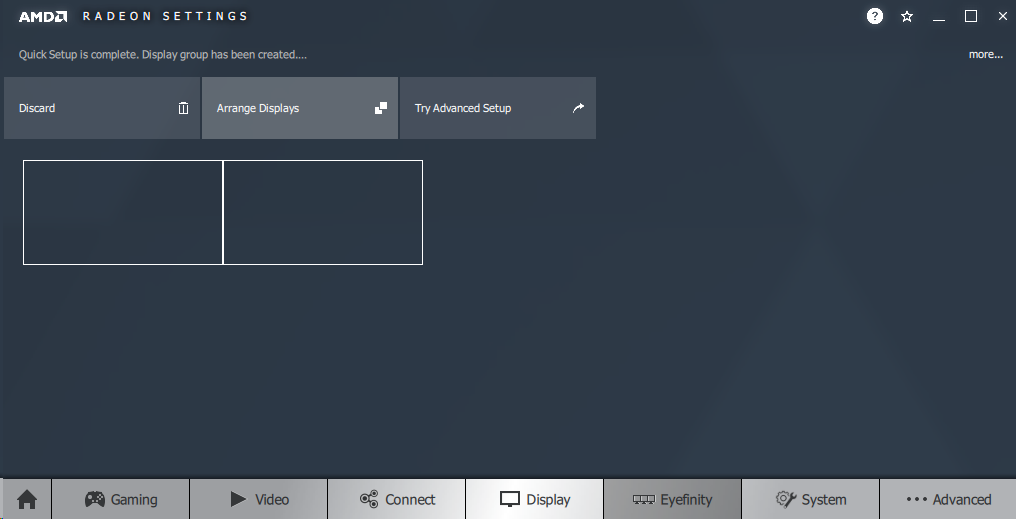
Eyefinity Display Grouping
Having more than one connection now adds the ‘Eyefinity’ button.
The AMD driver for Pico currently only supports a single horizontal row of displays. [October 2019]
Click ‘Eyefinity’ and then on ‘Quick Setup’ to arrange the displays.
Click a display to identify the actual output that is lit up blue:

The final display needs no identification.
Close Radeon Settings and restart the Pico.
Page edited [d/m/y]: 05/03/2020