If the Content Creator wants to remotely make changes to the encryption properties (such as change dates or venue details) they need the 7thSense Content Protection Manager application.
The items needed for the remote management process are the originally created CPR file, the Content Protection Manager Software Utility, the Delta CPS licence and the Creator password.
On the PC that is to be used for encrypting the movie content:
•Install Content Protection Manager
•Insert the USB Delta CPS Licence Key
•Load/confirm the original CPR is present.
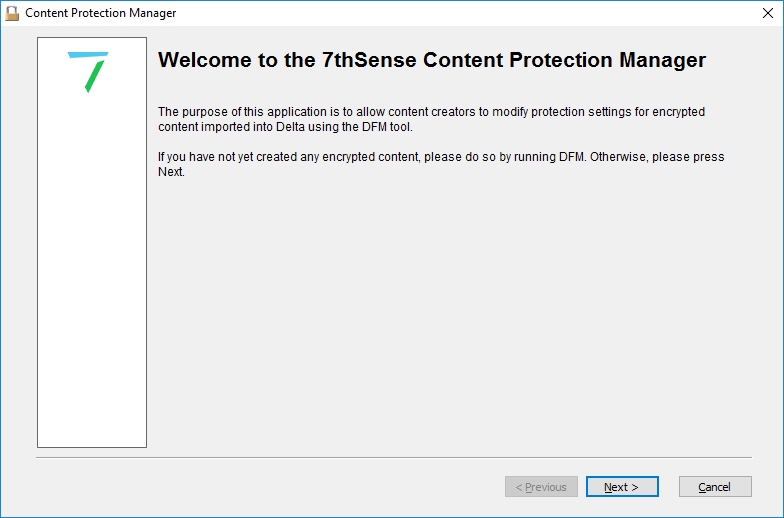
Start the Content Protection Manager
Click Next to continue
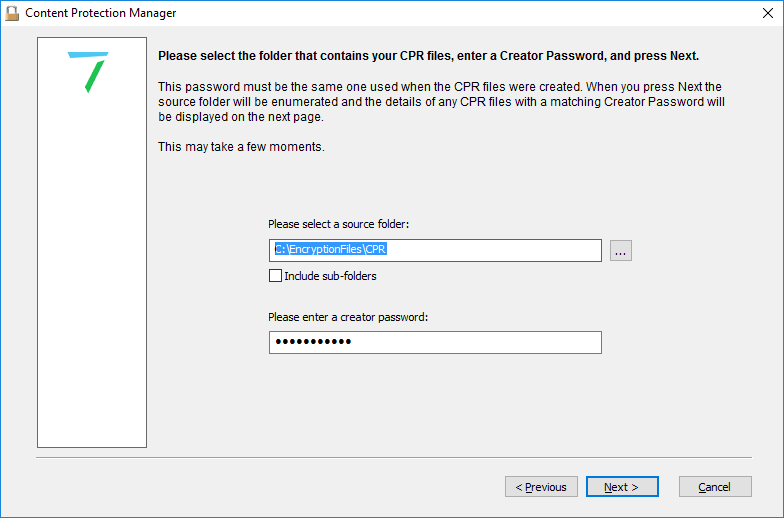
•Browse and select the source folder of the CPR file in C:\EncryptionFiles\CPR
•Check the Include sub-folders checkbox if the file is in a sub folder of the current folder.
•Type the password that was used to create the original CPR, in the creator password box.
•Once the next button is pressed, the Manager will search for CPR files that are related to the password entered.
•If any CPRs are found relating to the password, the Manager will open a new window showing all relevant CPRs.
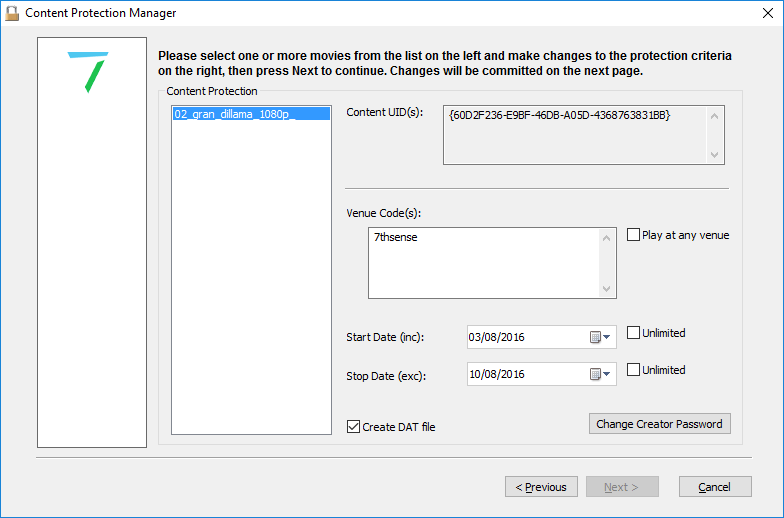
Select the CPR to manage:
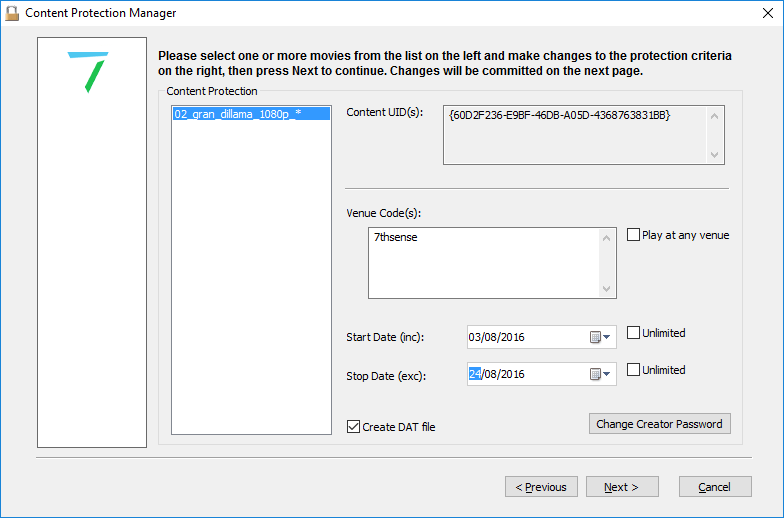
The relevant details will be displayed for your selected movie.
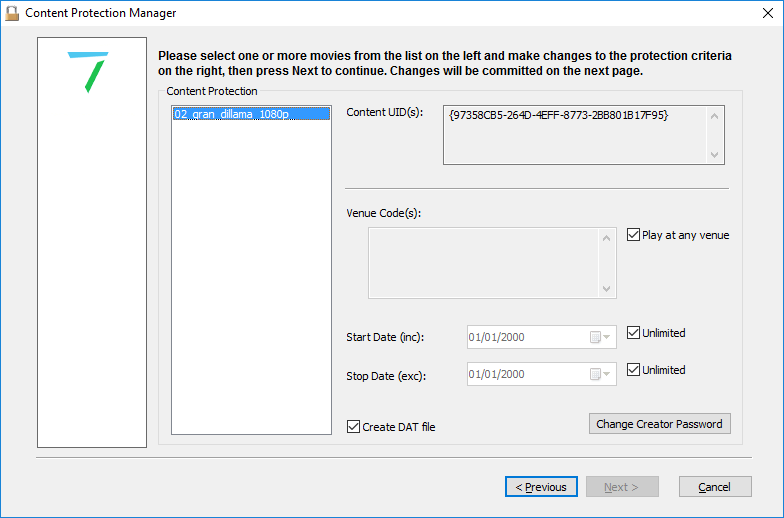
Note that if you have set the movie to play at any venue with unlimited dates (all checked) no Venue Code will be visible and the dates will default to 01/01/2000 and be greyed out.
Note: You can select multiple CPRs and add the same protection information to multiple CPR’s simultaneously. |
The encryption information may now be edited if required:
•To set to playback at a different Venue location, change the Venue name in the Venue Code(s) box.
•To play at any venue, check the Play at any venue checkbox.
•To have the movie play within certain dates, uncheck the checkbox (if checked), next to either the Start date (inc) or the Stop date (inc) or both. Type the start/stop dates in the appropriate boxes.
•To set unlimited start and stop dates, check the Unlimited checkboxes next to the relevant dates.
•Pressing the change Creator password button allows you to change the currently saved password for the selected CPR. Type in the old password and then the new one.
•To create and new DAT file for the encrypted content, check the Create DAT file checkbox.
If you make changes to the encryption details, the Next button will become active:
Click Next to show a window asking for you to select new output folders for modified CPR and DAT files. This is to enable you to maintain previous as well as create new – else the system will overwrite your previous files.
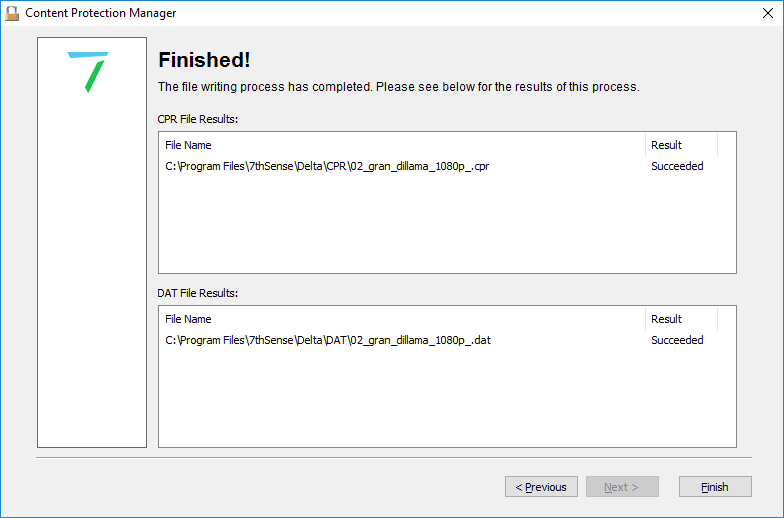
Click Next once you have selected where you want your DPR and DAT files to be stored.
Click the Finish button to close the Management program.
The newly-created DAT file can now be sent to the Venue for installing on the relevant Delta Media Server. The CPR file should be kept with the Content creator for any further possible changes.
Page edited [d/m/y]: 10/12/2020
