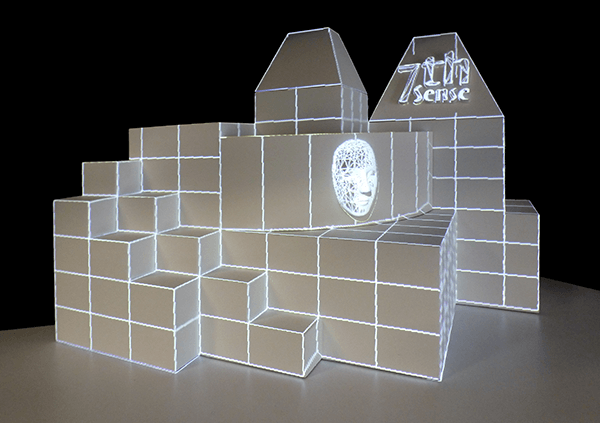
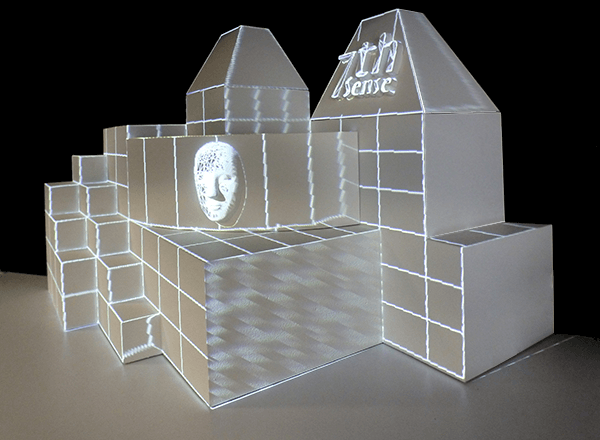
Now that the physical projectors are set up correctly for the media and model eyepoint, the model can be calibrated to the real-life object or canvas. This is done by projecting the mesh using the grid, with its edges and vertices, rather than the media, onto the object. Each channel is calibrated separately. The media is the same, the mesh is the same, and Delta does all the maths required to adjust for each projector position.
Per Channel Setup
With the Playback Window in full-screen mode, and DeltaGUI in Display > Mesh, with the mesh files set up as above, turn the grid on to 100%. (Grid size: the spacing of the .obj mesh depends on the file itself.) The grid will not show until a channel is calibrated.
If any warps or blends are on the timeline, you will see a red warning, and a checkbox to disable them. This is because the undistorted mesh should normally be added to the real-world canvas, and any warps and blends applied to the media once calibration is complete.
However, since the 3D Calibration process can interpret radial lens distortion from the resulting calibration points, this can now be automatically retrospectively applied to a timeline background flat geometry, for that channel. This can be further warped manually.
•Turn the beams off all but the channel you are calibrating.
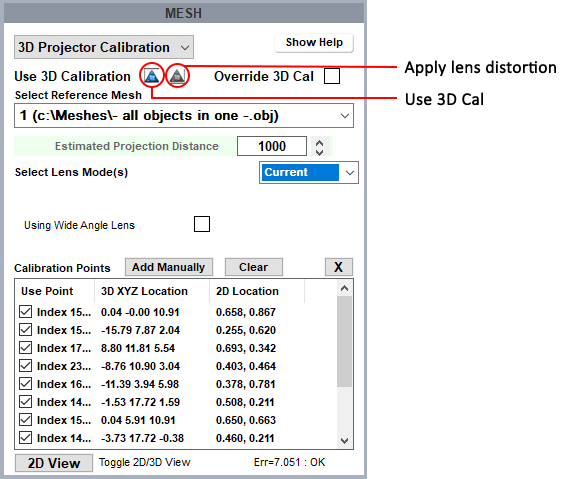
•In the Mesh panel, select 3D Projector Calibration view, click the left triangle button (changes from grey to blue) to select ‘Use 3D Calibration’, and select or ensure your reference mesh (.obj file) for this channel is correctly showing.
•Enter an estimated projector distance for this channel.
•Select Lens Mode.
Lens Mode
Current is the preferred setting for Delta 2.6 users, and further improves reliability. For users upgrading from Delta 2.5 to 2.6, calibrations previously made in Manual lens mode will appear as ‘Legacy_1’, and those made in Default lens mode, as ‘Legacy_2’. These two modes can continue to be used to modify the calibrations. For Legacy_1 and Legacy_2, see the Delta 2.5 User Guide.
2D/3D View
This is the button you will use to toggle between selecting a vertex from the model and placing it precisely on the object. 2D view is looking at the model from the projector position, 3D shows the reference mesh object.
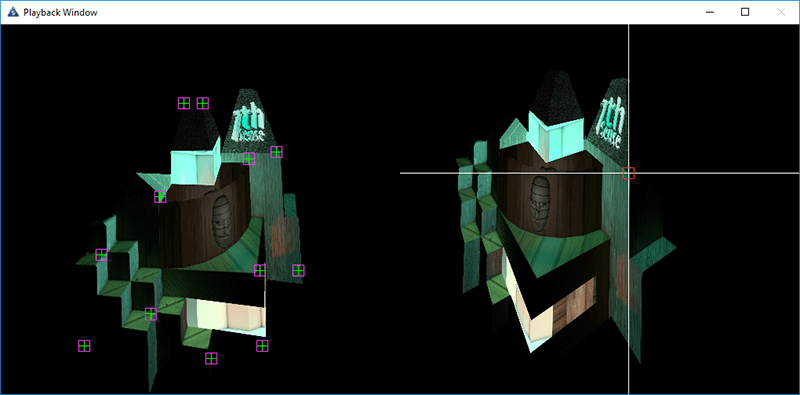
In this playback window view, channel 1 (left) has ‘Show all 2D points’ applied. Channel 2 (right) is the playback view when selecting an object node in DeltaGUI in ‘3D View’.
Calibration Points
Calibration requires at least 6 distinctive and distributed reference points (mesh vertices) to be accurately positioned, using DeltaGUI, on the object. Delta will infer the relative position of all other vertices, which is why a good 3-dimensional spread of calibration points is needed. Delta will then automatically calculate the mapping of the whole .obj mesh onto the object. This initial calibration may be sufficient, but further reference points can be selected and adjusted thereafter.
In 2D view, position the mesh model (this may be out of view, but the RESET button will recentre it). Manipulation of the model using the mouse buttons is the same as shown in Interactive view (shown right). This takes practice, but will be useful in being able to quickly rotate the model for a clear view of the vertices you want to use (rather than a node right behind it).
Mouse controls:
•Left-click + drag : pan and tilt the whole mesh
•Right-click + drag : shift the whole mesh
•Centre-click + drag : zoom
•Shift+left + drag : spin the mesh around a set point in 3D space
Hint: in Mesh Editor view, you can change the size of the dots marking vertices with Node Size . The movement of the mouse can also be adjusted, to control the responsiveness of the mesh image. |

When a node point is found, the dot is grey. When a vertex is selected, it is red. When it has been set, it shows green.
Select a vertex, and switch to 3D view. Now look at the object/canvas and just move the mouse (no buttons) to drag the white cross-hairs in a red box, over the same point in the object:
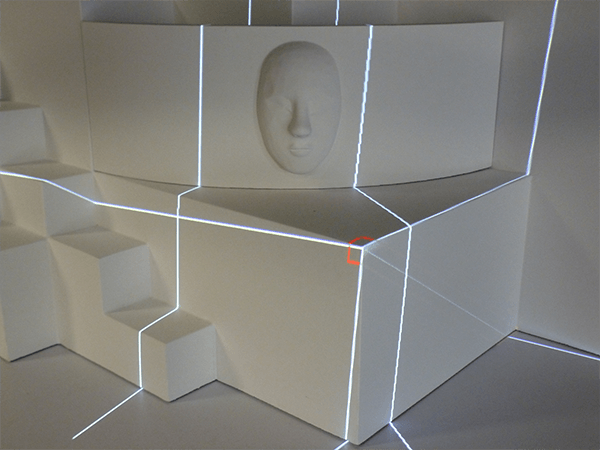
Press Ctrl + left-click to register this point, and the lines will turn green. This point will now be listed in DeltaGUI with its 3D XYZ model coordinates and 2D channel-frustum location. The mouse position need only be approximate: after registering the point, you can nudge it into more exact position with Ctrl + arrows or Ctrl+Shift+arrows (fine control). You can choose later not to use it, if for some reason it is not being useful, or you can readjust it by selecting from the list in 3D mode (it will be shown on the object) and nudging it again.
When you have 6 registered points, DeltaGUI will calculate the whole mesh, and the whole grid will be displayed on the object. It should be a reasonably good fit. There are two obvious points here that can be selected to improve the result:
Now look around the other side, which will be covered by the second projector, and we see that it might be better not to include part of the mesh here at all:
We can calibrate the second projector now, and return to the mesh editor later to tidy up, and to hide or fade these faces per channel.
Here is one completed channel in DeltaGUI:

Editing Calibration Points
To adjust any point, select it in the list (make sure you don’t deselect it in the checkbox) in 3D mode, and it will show a red box around the vertex on the object. Nudge it into a better position with Ctrl+arrows or Ctrl+Shift+arrows (fine control).
Clear: If you want to start over, click ‘Clear’.
: Delete a selected point only.
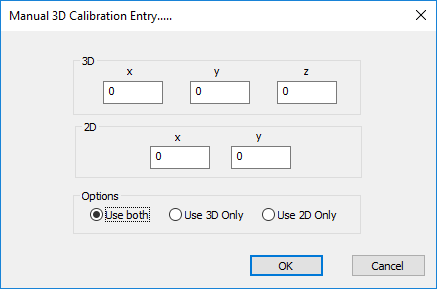
Add Manually: If you have precise calibration points available from tracking software such as BlackTrax, these can be added manually:
Viewing the Result
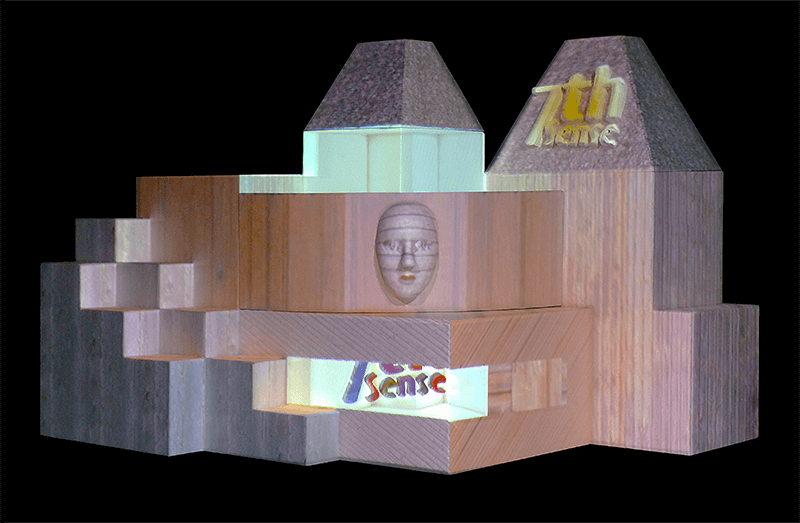
Now take the grid display off, and go back to DeltaGUI > Layers and add or enable your media in the Timeline, and your media should fit the object. UV-mapped media is baked into the .obj model, but flat-projected media may take additional adjustment for a perfect fit.